
If you are interested in recording your own audiobook, creating an home studio allows you more control over the sound of your recording and it’s significantly less expensive than hiring it out. This article is for authors or narrators new to audiobook creation.
In the rest of this post, you’ll find tips on how to make an audiobook home studio. In this article, I cover the many different types of home studios you could create in your home as well as the equipment you’ll need to get started.
The table below gives the relative costs of treating your home studio with sound dampening material.
| Home Studio Types | Cost |
| Ready-Made Sound Booth | $3000 |
| Heavy Fabric & Small Room | Free |
| Carpet & Small Room | $1560 |
| Acoustic Foam Panel & Small Room | $500 |
| Comforter & Closet | Free |
| Mattress Fort | $300 |
| Sound Dampening Shield | $100 |
| Blanket & Frame | $300 |
In the steps below, I go into much more detail about several different types of home studios.

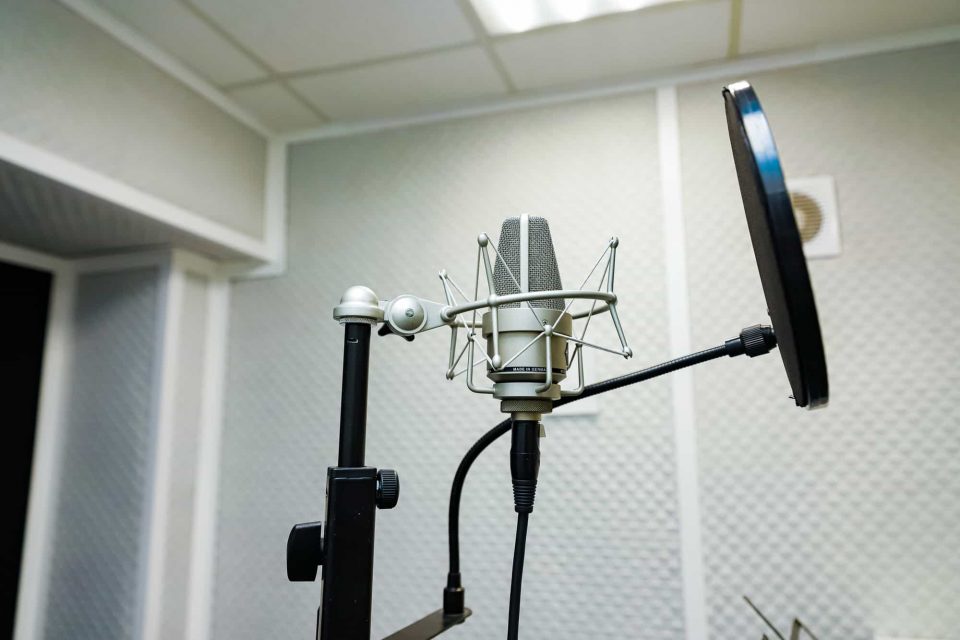
#1 Select a good microphone
A microphone is an instrument that translates sound waves into mechanical vibrations by using a flexible diaphragm. These vibrations are then converted to electrical signals. A good microphone provides desired frequency results for your voice.
To find out what you might want, test different types of microphones like your computer’s mic, your cell phone’s mic, hand recorder, and professional microphone. Do you hear a difference when you listen with closed back headphones?
The best mic for audiobooks is a condenser microphone. The diaphragm is very light and fragile, and this makes it very sensitive as well as accurate. This extra sensitivity is perfect for recording audiobooks.
Keep in mind that a cheap mic can increase your noise floor and make your audiobook inadmissible to ACX or any other distributor.
Most beginners use a USB only microphone. It provides a high quality recording, and it’s also inexpensive. Once you have a little experience, you can move to even higher quality microphones that require an external power source like a preamp.
If you would like to learn exactly which home studio equipment I recommend, take a look at my article What Equipment Do You Need to Record Audiobooks.
#2 Choose a solid audio interface and preamp
If your microphone is USB only, then you will not need an audio interface and preamp. Skip to the next tip. However, if your microphone needs an external power source you will need the preamp and audio interface, and you should keep reading.
A preamp powers the microphone and amplifies (increases) very weak signals before feeding them to the audio interface. Preamps bring signals (from microphone) up to level while introducing very little noise and distortion.
An audio interface takes the analog signal from the preamp and feeds it to a digital audio workstation (DAW). The DAW is software that you can use to record, edit, and master your recordings.
Usually, the audio interface and preamp are combined to form a digital interface. A good digital interface provides quality analog to digital and digital to analog conversion without introducing a lot of noise.
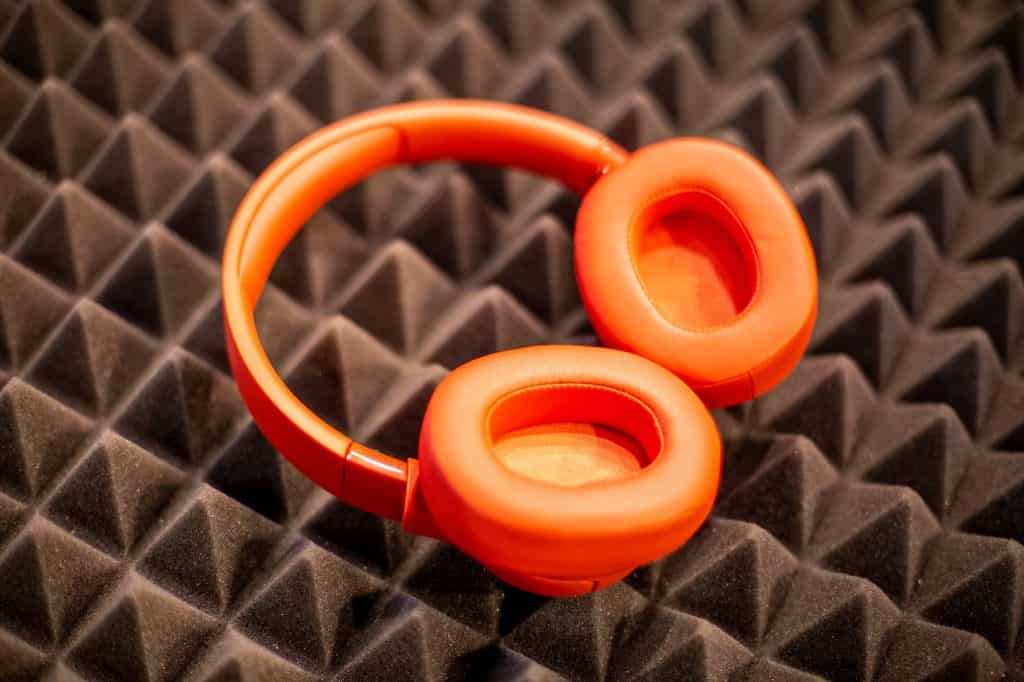
#3 Select closed back headphones
Headphones will help you hear what you’re saying allowing you to catch mistakes early. They should be closed back and not open because you don’t want sound leaking out and being picked up by your microphone. Good headphones help during narration because you can hear errors and make corrections before post-production.
You’ll also need a pop filter to screen out natural pops and hisses that are characteristic of speech.
#4 Select a good digital audio workstation (DAW)
A good DAW will save time as it fixes errors in the narration. Audacity is the DAW most beginners use because it’s free. If you use Audacity, also use ACX Check, which is a plugin that makes sure you meet the ACX mastering standards.
However, Audacity doesn’t have all of the features that could speed up mastering your audiobook. Instead, you may want to try Adobe Audition.
#5 Remove noise contributions
Be wary of cooling fans on your computer. If you’re using a desktop computer or you have a noisy laptop, keep your computer separate from your mic.
Remove as many noise contributions as possible like the, air conditioner, ticking clock, refrigerator, dogs barking, loud trucks, etc.
#6 Prepare your recording space
Your recording space or studio has two functions: 1) dampen sound in your studio; 2) isolate from external sound sources.
With this in mind, there are some spaces you should avoid as recording spaces like large rooms, small rooms with hard reflective surfaces, and outdoors. Large rooms and small rooms with hard reflective surfaces will result in an echo. Outdoors you have no control of dogs barking, trucks driving by, and birds singing.
Below are some examples of sound booths you could make into a home studio:
Ready-Made Sound Booth
A ready-made sound booth is a booth you can purchase on Amazon that’s already lined with sound dampening material. You can use it as soon as you assemble it. However, it can cost thousands of dollars. There’s no need to spend that much money for good sound.
Heavy Fabric & Small Room
Hanging old thick curtains along the walls of a small room or closet is a good way to dampen sound as you record your audiobook. If you already have the old curtains, this could be an inexpensive but effective solution to creating a home studio. You could also hang a duvet or quilt behind your microphone to absorb more sound.
Carpet & Small Room
If you have a small room or closet, install carpet on the floor, walls, and ceiling. If you have a room that’s 10 ft by 10 ft, the surface area of the floor, walls, and ceiling will be 520 ft. Usually, a lower quality carpet can be installed for $3 per ft2. This creates a total price of $1560.
Alternatives to carpet are cork and rubber, but you’ll have to check prices for all of these options and see what fits into your budget.
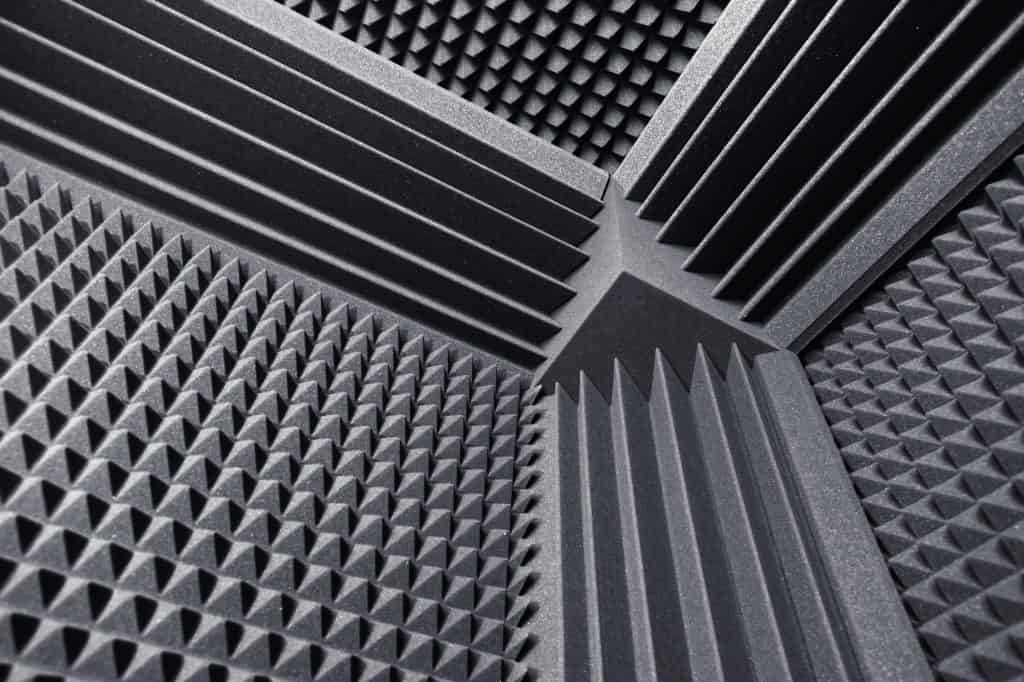
Acoustic Foam Panel & Small Room
Acoustic Foam panels work well in a small room. They absorb sound during narration decreasing the chance of echo. You can adhere it to the walls and ceiling.
If you have a room that measures 10 ft by 10 ft with 8 ft ceilings, the surface area is 420 ft2. A pack of acoustic panel on amazon is $100 and contains 96 panels. You would need less than 5 acoustic panel packs to cover the walls and the ceiling. The total is $500.
If you have a hard floor, you’ll need to use something soft like carpet, cork, blanket, etc., Keep in mind that acoustic foam doesn’t block external sounds from entering the studio.
If you would like to learn more about acoustic foam for home studios, take a look at this article How to Soundproof: Acoustic Foam Does Not Block Sound by Acoustical Solutions.
Comforter & Closet
A walk-in closet filled with clothes will help absorb sound because of the clothes. However, you still have to cover the ceiling and the floor. If you have a smaller closet, then empty the closet and hang comforters, towels, and blankets all the way around the closet. Fill the space above the closet shelf with clothing so that there are no hard wall spaces exposed.
Mattress Fort
Another option is to create a mattress fort by surrounding yourself with mattresses. You can buy thin mattresses at Walmart or Target that cost less than $100 each. If you use 3 mattresses to create the fort, you’ll spend $300. It won’t look elegant, but it’s a very effective to remove echo during your narration.
Sound Dampening Shield
A sound dampening shield creates a wall behind your microphone. This wall dampens the majority of echo that may come from any hard surfaces behind the mic. These shields typically don’t prevent sound waves above and below the shield and are therefore not as useful as other options in this list. You can purchase these from Amazon for less than $100.
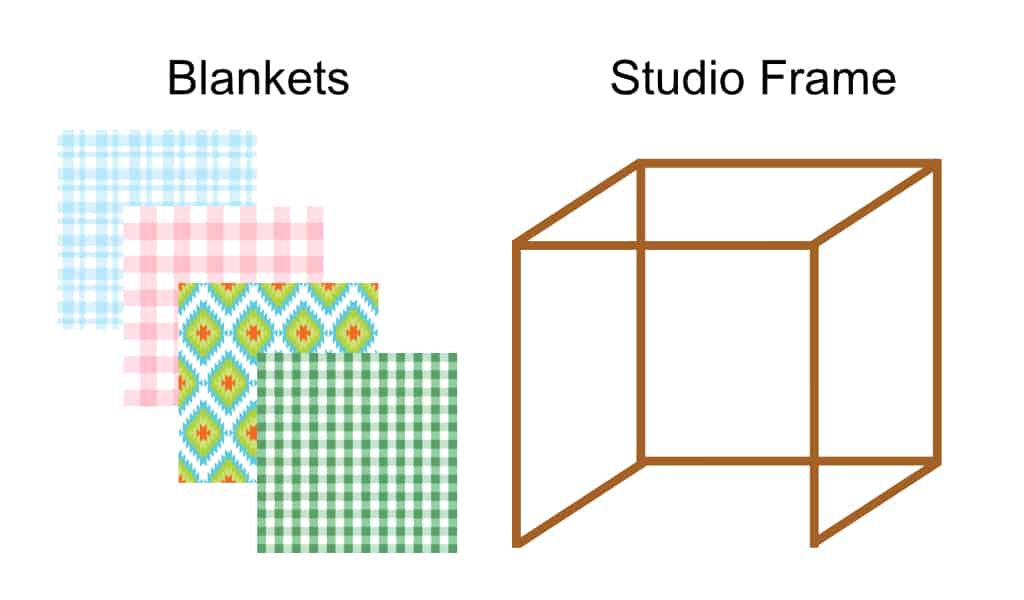
Blanket & Frame
A blanket and frame booth is created with a box frame around you and your recording equipment. The frame could be made from PVC pipes or wood and should cost less than $300. Use old blankets you have around your house or sound baffling blankets draped over your frame.
If you would like to learn more about options for home studio, take a look at this article Why Do I Need a Vocal Booth? by Musician on a Mission.
#7 How to build your recording booth or sound studio (Mini-Guide)
This is a mini-guide for beginners. It’s an overview of the basic steps needed to build a sound studio.
Step 1
Build a simple timber frame that fits in your desired recording location. The space should be big enough for you, your microphone, computer, desk, and chair. Note that the computer should not be on the same surface as the microphone. The mic will pick up the cooling fan noise.
Step 2
Cover the frame with audio blankets. These blankets absorb sound and reduce echo while you’re recording.
Step 3
Place your equipment inside the sound studio. Now, you’re ready to get started!
#8 Remain consistent from day-to-day
You’ll probably take several days or several weeks to record an audiobook. However, from the listener’s point of view, it’s important that it sounds as if you read the entire audiobook in one sitting.
In other words, the narration needs to be consistent from sentence to sentence and chapter to chapter. The best way to correct that’s to listen to the previous day’s narration to understand what your energy level was for that part of the audiobook. Then, practice narrating until you have your desired level of enthusiasm.
Pay attention to microphone placement, humidity, temperature, and try to keep them consistent throughout your recording.
Conclusion
This article discusses several options for audiobook home studios. Your goal is to record in a space that dampens echoes. This can be as inexpensive as lining your walls with old blankets or as expensive as a ready-made recording booth. Since you’re just starting out, I recommend you start as economically as possible and focus on your craft of learning to record audiobooks.
Have you created a home studio? What did you use to dampen the sound? Let me know in the comments below.